Project: Wall Hanging Tool Cabinet -Start to Finish
This is probably a fools errand but here goes ...
No matter how large the shop, there's always a shortage of wall space on which to store stuff where it will be findable and accessible. A wall hung tool cabinet can effectively double the wall space it occupies AND it can keep dust off tools stored inside.
Here's the beginnings of a "Start to Finish" description of the process I went through to eventually end up with two wall hanging tool cabinets shown elsewhere. I've prepared this document to help me avoid some of the potential mistakes when making similar cabinets. What follows may also provide other newbies insights into one approach to things - from concept to finished piece with notes on initial considerations and issues which came up along the way.
If I state the obvious it's because it wasn't "obvious" to me at first. I hope this will be of use to others
INITIAL DIMENSIONS
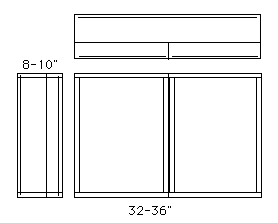
- 32-36"wide (will necessitate 2 doors)
- 28-29" tall (has to fit in space with conduit below and garage door above)
- 8-10 " deep (deeper would interfere with sliding compound miter saw in front of the bottom of the cabinet)
- doors should have a minimum of 2" deep space to hold chisel racks or other "flat" tools etc.
- door panels should be made of 1/2" thick stock to permit attaching things to the inside of the doors
- carcass should be made if 3/4 - 1" thick stock since the cabinet may hold heavy tools (metal planes etc)
- the back should be 1/2-3/4" stock to permit attaching things to it

MATERIALS
Door Panels Wood - 1/2" final thickness
- Light weight (doors will be 2-2 1/2" deep so weight will be an issue)
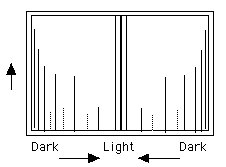
- Light colored wood (want to reflect light - shop never has enough light)
- Interesting but not overpowering grain pattern/figure (in addition to holding tools, the cabinet should be nice to look at)
- Inexpensive (this is after all shop furniture)
- Easy to work (forget curly or bird's eye maple etc.)
Found 3/4" Poplar boards that were almost white with a little beige figure and NO GREEN tinge, common with poplar
