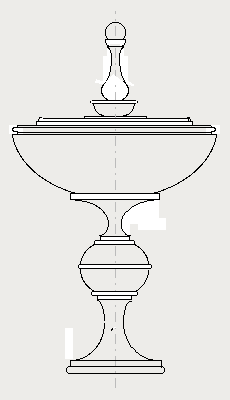
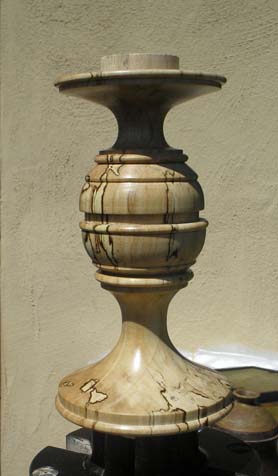
Here's the piece with the idea for the pedestal

Hmmmm -that sphere in the middle of the pedestal - could ALSO be - a little lidded box - to hide one last marble in. Hmmmm.
Had a dry round spalted blank that'd work. I've done lidded boxes before so I consulted my notes on the chucking sequence (If you haven't done a lidded box, click this link for the chucking sequence) and got started on turning the pedestal
When using spalted wood, you often can't predict where the spalting goes inside the piece you're turning. There's always a risk that you'll turn away the spalting in order to get the shape you're also after. So this pedestal was a compromise between the aesthetics of the profile and the spalted look of the piece.
Another "challenge" with turning lidded boxes is disquising where the "lid" and "box" join - especially with wood that has a noticable pattern - like spalting.. In this case, I wanted to use the spalting for a "Marbled Look" - glass marbles being a key element for this piece - a marbled pedestal to keep with the Marbles Theme was a happy coincidence (or had my Muse planned all this in advance before whispering an idea in my ear?).
Note the gap between the "top" and "bottom" of this pedestal. That gap will hold the two parts together and won't be seen when the "box" is closed. This can interrupt the spalting pattern flow when the box is closed - if the spalting patterns don't line up. I happened to get lucky on this one. OR - did my Muse steer me to a chunk of wood that would work - and a profile that would use the spalting quite nicely?

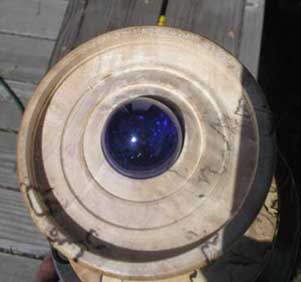
As I began hollowing out the "box" in the bottom of the pedestal I saw an interesting possibility - an eye ball staring out of the box . This could add a surprise element to this piece. So I pursued the idea.
The eye ball idea was basically just turning a big bead - something I've learned to do pretty well doing a lot of between centers spindle turning. But turing a bead INSIDE alittle box - that's only 2" in diameter - is just a "little bit" trickier. When rolling a bead you start with the cutting edge horizontal and end the cut with the cutting edge vertical. It's that "ending up vertical" that gave me a lot of grief - and four or five dreaded Spiral Cuts.
When your idea runs up against the limits of your current skills level you've got a dilema. Do you push your skills level - and maybe grow - or maybe destroy the piece - OR - drop the idea and Keep It Simple Stupid (KISS) and play it safe?

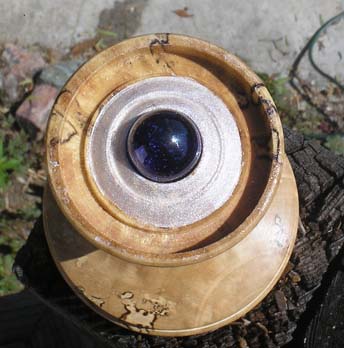
My answer - stop - and PAINT IT!
A coat or two of brushed on FastColor Pearlescent White and a couple of sprayed on coats of "ClearKote" lacquer got me here.

Now I'm going to use some blue Prisma Color felt tip pens to do the "iris", some red felt tip lines for a slightly blood shot look and another couple of coats of ClearKote should make this look more like an eyeball. Wild Hare Ideas are fun to pursue!