There's only one more little kid in the neighborhood who hasn't gotten her Magic Wand - yet. The delay is a result of over promising. I'd been playing with little micro computers - the size of two pennies placed end to end - controlling an RGB LED (an LED that has Red Green and Blue LEDs in one lense - and can thus put out any color in the visible spectrum) - and small acrylic rods in place of fiber optic cable - to get the LED's light from inside a piece out to specific places on the the outside of a hollow form. I promised this little girl that I'd make her a very special magic wand - whose tip could sparkle and change colors.
Problem was - the only "button" battery Radio Shack had a battery holder for - was the size of a quarter. With the flat battery holder, it was over an inch in diameter - with a bumped out square to hold the top clip - so I needed to hide something 1 1/4" acrossed. To get some wood around it I'd need a part of the wand to be at least 1 1/2". Got that sort of worked out - but - I couldn't figure how to work in an On/Off switch.'
Ruminating time sometimes pays off. Acquiring things that you have no foreseeable use for - but may have possibilities somehow - sometimes comes in handy. Before I started playing with micro computers controlling electronic things - like LEDs - I was picking up little things with LEDs in them, intending to try them inside pieces to enable me to project internal to a piece light out through pierced areas in the piece. I'd left these little LED devices all over the place.
While moving some of my old turnings around I found a simple cup I'd turned, one of the first end grained pieces I did. Inside it was a caribener - with a little LED in a blue anodized aluminum tube. Twist the top - and the LEDs start flashing, Twist it the other way - and the LED goes off. Small, with hearing aid batteries inside, and a very simple way to turn it on and off. PERFECT!
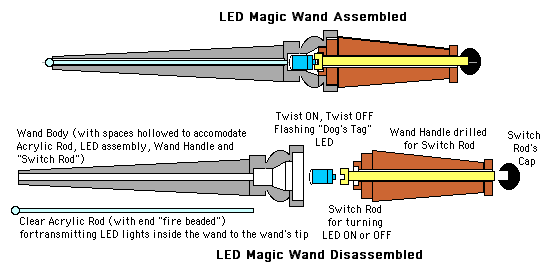
This is the idea I came up with.

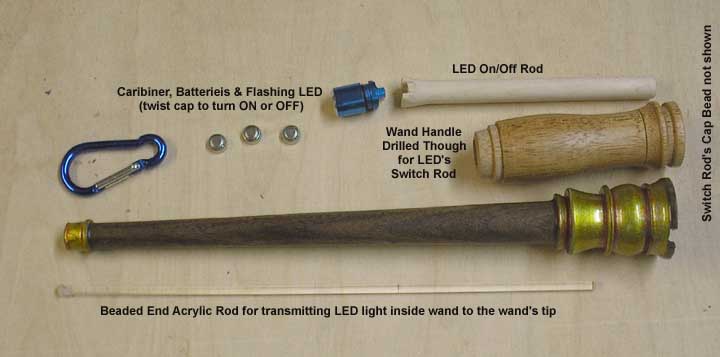
And here are the actual parts - except for the bead for the top of the "switch rod" that goes through the handle.

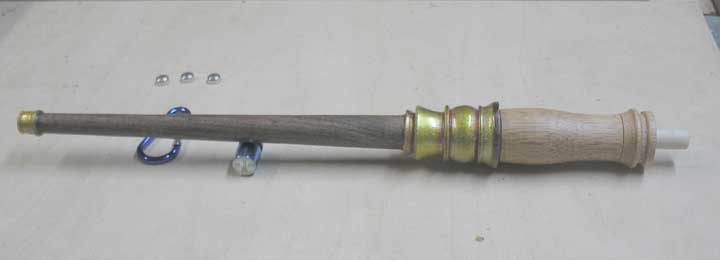
Assembled

Now all I need to work out is how to attach the handle to the want - and be able to get it off when the LED's batteries need replacing . . .