Evolution of a Four Drawer Base Unit for a Mortising Machine - page 1
There are a lot of woodworker sites full of pictures of finished pieces, some even have a few "in progress" pictures. But it's the "why" part that's hard to find. Why did he go with that joint? Why'd he/she go with three rather than four drawers? Why use that particular wood? Why choose that finish? Why, why, why? So here's my attempt to fill in just a little bit of that gap.
Now some folks start with a complete set of plans, with cut lists, exploded views and notes on how to do a particular part or assembly. Others start with a set of plans and modify them right off the bat. There are woodworkers who can clearly visualize the finished piece and know exactly what they're going to do before they pick up the first tool or make the first cut. I'm not like any of those people. Other than some specifics - it has to be no wider than this, no taller than that and no deeper than X inches - it's a wing it process - what to do next and what are the options kind of thing. Sometimes the function of the piece answers the next question, sometimes it's the available wood that changes the direction, sometimes it's just "that would look nice". This approach usually, but not always, gets me to a finished piece I'm pleased with. Of course, no project ever turns out without some flaw (sometime lots of flaws), something I'd wish I'd done differently. But hey, you gotta leave room for growth right?
So, for those looking for WHY? - here's my example:
I wanted to make a four drawer base unit for the General 75-075 M1 mortising machine, a close to 200 pound beast. As usual making shop furniture, I was going to slap something together out of whatever was handy - some old 2x4s, some poplar, pine and birch or cherry ply for the panels and maybe a banded oak ply top. Wanted to make a quick and dirty just to get the mortiser off my assembly bench, out of the "cleaner" room and into the machines area.
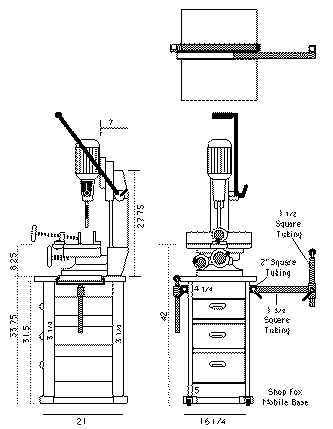
Naturally, I chose mortise and tenon joinery , most 3/4" wide by 1 to 1 3/4" deep by 2-3 inches tall. The unit would have to withstand a lot of weight and a lot of leveraging. It also had to fit in a mobile base and that dictated the basic width and depth - 16 1/4 by 21 inches. I wanted the final height to be around 32" so the machine's table height would be around 42 inches, high enough to see layout lines without bending over much, but not too high or I'd have to jump to grab the lever arm of the mortiser.
I didn't want the damn thing falling foreward onto me when levering the chisel and bit into stock so I planned on not only bolting it to the base but also leaving room under the bottom drawer for adding a lot of weights to keep the center of gravity really low. I also planned to put outrigger support rollers which would telescope out from under the sides of the top to support bigger stuff. That's why the top and bottom rails (or are the horixontal parts the stiles?) are so wide - 4" on the top and 5 " on the bottom.
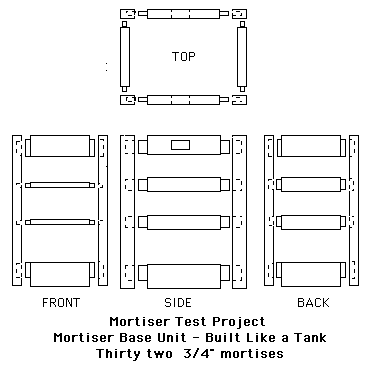
This is what I started with


Found some 2x4s that would work for the uprights and ripped off the rounded edge on two faces to get two square corners. Did the same later for the cross members - unfortunately with a different rip set up so the parts weren't the same thickness - dumb! Found an old 2x6 and cut it for the top and bottom "rails" and the left overs were ripped for the drawer dividers.
Of course the "plan" changed very early on. Did the rails and stiles first - intending to make a three drawer unit just like "the plan". Then I dry fit them together, did some measuring and decided it needed FOUR drawers. Three panel sides and four drawers? What the hell, "it's just shop furniture" and you can never have enough drawers.
Note #1 If I'd made the rail and stile stock the same thickness, doing the mortise and tenon layout would have been a lot simpler - same reference faces. But . . .
Cut the drawer dividers and fiddled with them 'til the spacing looked about right then pocket hole screwed them in place. That told me where the drawer guides should be dadoed into the sides. That in turn dictated where the grooves in the rails or stiles should go (see how things evolve?). This was possible because the joinery was mortise and tenon. You can dry fit things without using a ton of clamps. Step back, figure where things should go, mark things, take it apart and make the cuts.
Note #2 - Some joinery lets you do step #1, put it together and see how step #2 will go. Unlike ply and face frame stuff which seems to require 8 hands and a ton of clamps, solid wood joinery supports itself so you can evolve a piece incrementally without commiting anything to glue first.
on to page 2 of the Evolution of the Mortising Machine's Four Drawer Base Unit ---->